Page 552 - Manual Oficina Polaris Sportsman 570 2014 a 2016
P. 552
STEERING / SUSPENSION


                                     CAUTION                                              TORQUE
                 Upon A-arm installation completion, test vehicle at low             A-Arm Fasteners, SP:
                          speeds before putting into service.                          37 ft-lbs (50 Nm)

                                                                     12.Insert bearing carrier ball joint end into a-arm. Install
                LOWER A-ARM REMOVAL (SP)                                new washer and castle nut. Torque new castle nut to
                                                                        specification.
                1. Properly lift and support the vehicle by the frame.
                                                                                          TORQUE
                2. Remove the appropriate front wheel.
                                                                                        Castle Nut, SP:
                3. Remove the Cotter pin from the lower ball joint.
                                                                                       30 ft-lbs (41 Nm)
                4. Remove the castle nut and washer.
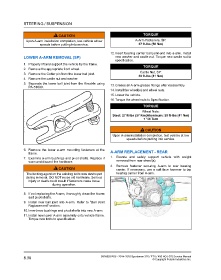
                5. Separate the lower ball joint from the Knuckle using  13.Grease all A-arm grease fittings after reassembly.
                   PA-51600.
                                                                     14.Install the wheel(s) and wheel nuts.
                                                                     15.Lower the vehicle.
                                                                     16.Torque the wheel nuts to Specification.
                                                                                          TORQUE
                                                                                         Wheel Nuts:
                                                                       Steel: 27 ft-lbs (37 Nm)Aluminum: 30 ft-lbs (41 Nm)
                                                                                          + 1/4 Turn


                                                                                           CAUTION
                                                                       Upon A-arm installation completion, test vehicle at low
                                                                               speeds before putting into service.


                6. Remove the lower a-arm mounting fasteners at the
                   frame.                                            A-ARM REPLACEMENT - REAR
                7. Examine a-arm bushings and pivot shafts. Replace if  1. Elevate and safely support vehicle with weight
                   worn and discard the hardware.                        removed from rear wheel(s).
                                                                     2. Remove fastener securing A-arm to rear bearing
                                     CAUTION                             carrier. If necessary, use a soft face hammer to tap
                 The locking agent on the existing bolts was destroyed   bearing carrier from A-arm.
                 during removal. DO NOT reuse old hardware. Serious
                   injury or death could result if fasteners come loose
                                 during operation.

                8. If not replacing the A-arm, thoroughly clean the A-arm
                   and pivot shafts.
                9. Install new ball joint into A-arm. Refer to “Ball Joint
                   Replacement” section.
                10.Insert new bushings and pivot shafts into new A-arm.
                11. Install new lower A-arm assembly onto vehicle frame.
                   Torque new bolts to specification.


                8.30                                            9926803 R06 - 2014-2016 Sportsman 325 / ETX / 450 HO / 570 Service Manual
                                                                                                © Copyright Polaris Industries Inc.

